Homemade Peanut Butter Cups with Chocolate Shell
Uitgelicht onder: Favoriete eenvoudige bakrecepten
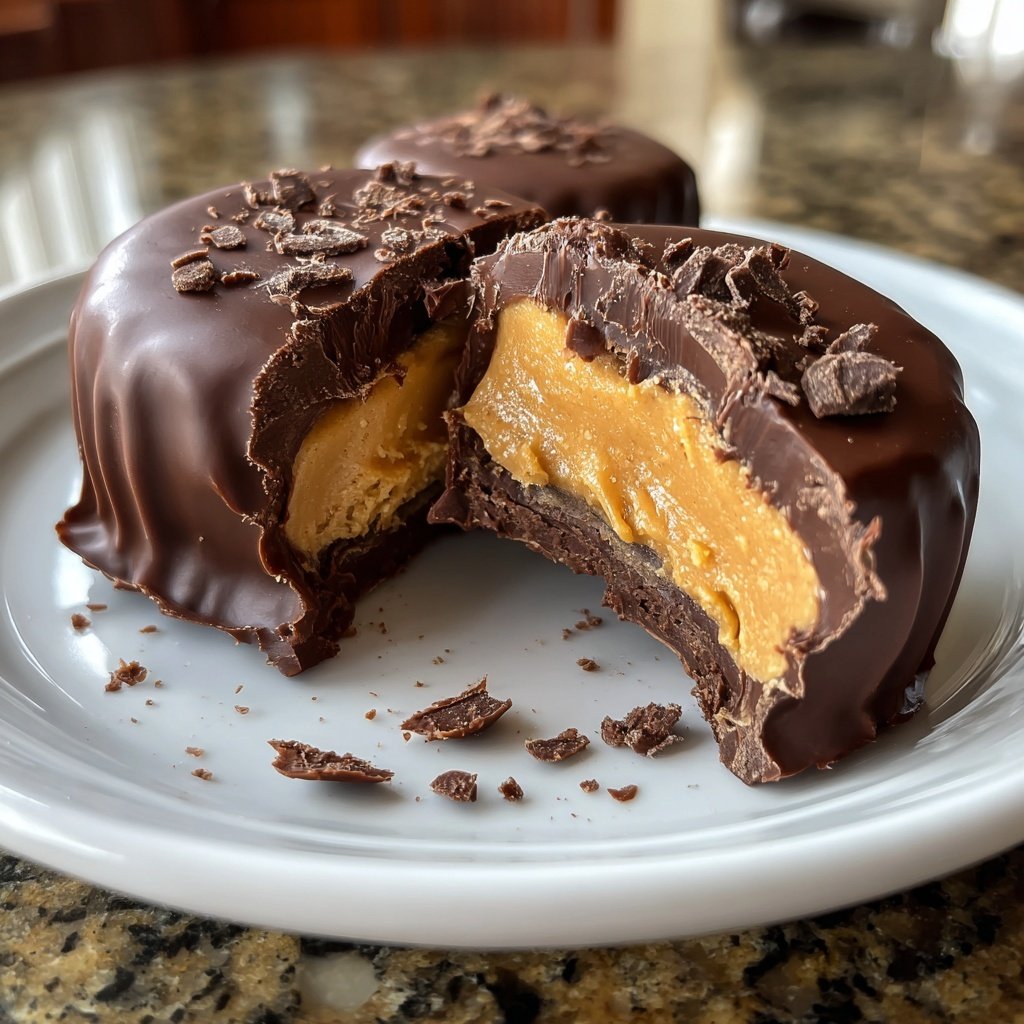
I absolutely adore making my own Peanut Butter Cups. The process is surprisingly simple and allows me to customize every element, from the type of chocolate to the filling. It's such a delight to marry the rich creaminess of peanut butter with the glossy, melted chocolate shell. Every bite feels like a mini celebration. These homemade treats have quickly become a staple in my kitchen, perfect for satisfying my sweet tooth or impressing friends at gatherings.
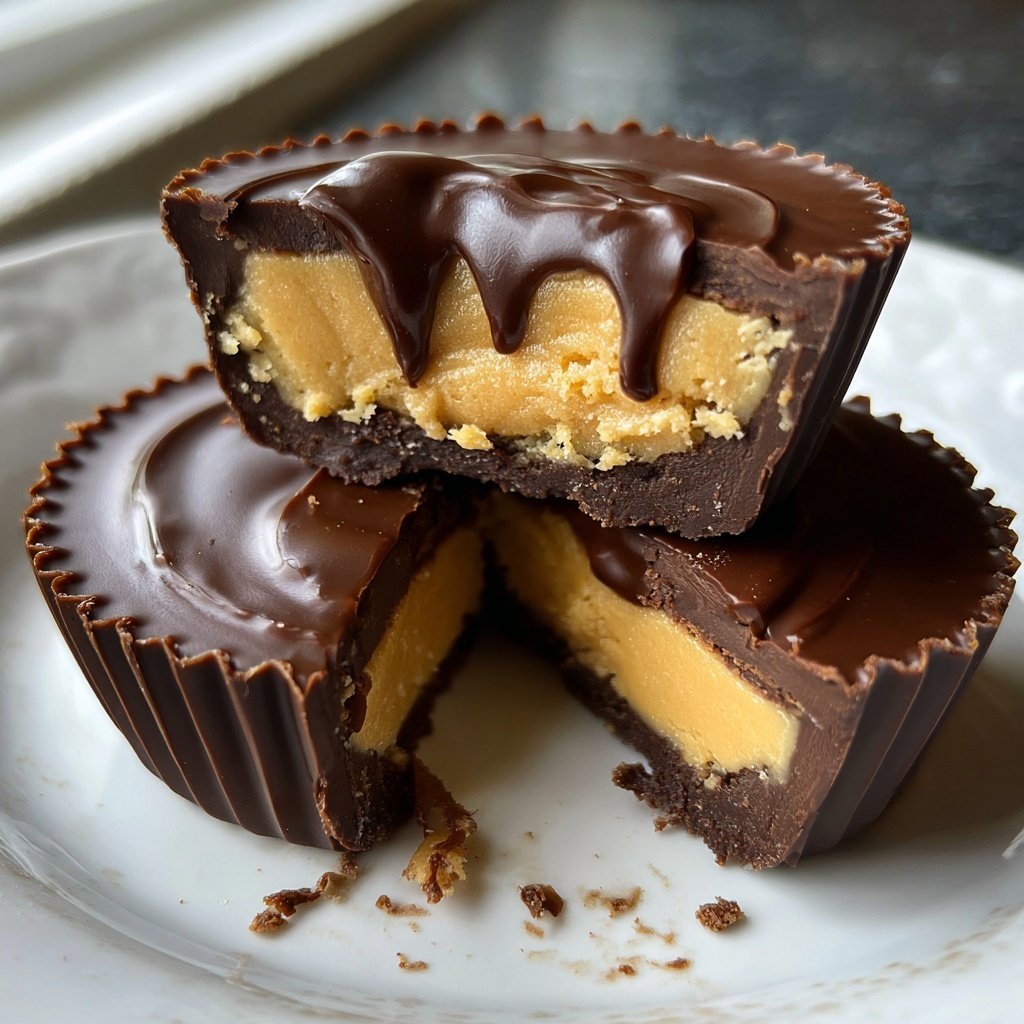
When I first made these Homemade Peanut Butter Cups, I was shocked by how easy it was to recreate such a classic treat. The combination of smooth peanut butter and rich chocolate truly elevates the experience. I found that using a mix of milk and dark chocolate offers the perfect balance of sweetness, which my family loves.
One of the best tips I can share is to let the chocolate shell cool slightly before adding the peanut butter filling. This ensures that the peanut butter doesn’t melt into the chocolate, keeping each layer distinct and delicious. Once you try these, you'll understand why they’re so addictive!
Why You'll Love These Peanut Butter Cups
- Rich chocolate flavor paired with creamy peanut butter
- Customizable for different chocolate preferences
- Perfect for sharing or enjoying as a sweet treat
Mastering the Chocolate Shell
Creating the perfect chocolate shell is crucial for achieving that delightful contrast with the creamy peanut butter filling. I recommend using a combination of milk and dark chocolate, as this balance provides a rich flavor without overpowering the peanut butter. When melting the chocolate, be sure to use a microwave-safe bowl, as using a different material may affect the melting process, leading to burnt chocolate. Stirring every 30 seconds ensures that the chocolate melts evenly without reaching a temperature that could cause it to seize.
After melting, the key to a successful chocolate shell is ensuring a thin but even layer in the molds. It's important to coat the sides of the liners as well; otherwise, you may end up with cups that crumble when you try to remove them. Consider using a small paintbrush or the back of a spoon to help spread the chocolate, as this will give you better control. If you don't have a muffin tin, silicone molds are an excellent alternative for easy removal.
Perfecting the Peanut Butter Filling
The filling is where your creativity can shine. Using creamy peanut butter creates a smooth, luscious texture that contrasts beautifully with the crisp chocolate shell. If you prefer a little crunch, you can swap in chunky peanut butter for added texture. Keep in mind that variations in peanut butter’s oil content may affect how firm the filling sets; if your mixture seems too soft after adding powdered sugar and butter, consider chilling it briefly to make it easier to scoop.
Incorporating the unsalted butter not only helps to enrich the filling but also adds a necessary creaminess that enhances the overall mouthfeel. If you're looking for a lighter option, substituting coconut oil for butter can provide a different flavor profile and make the cups dairy-free. Just make sure to use a refined coconut oil to avoid an overpowering coconut taste that might clash with the chocolate and peanut butter.
Storage and Serving Tips
Once you've made these delicious peanut butter cups, you might find they disappear quickly! However, if you have leftovers, store them in an airtight container in the refrigerator. They can last up to a week, but I bet they won’t stick around that long. For longer storage, consider freezing them. Simply layer the cups between parchment paper and keep them in a freezer-safe container. They can last for up to three months; just allow them to thaw at room temperature for a few minutes before indulging.
To elevate the presentation of your homemade peanut butter cups, consider garnishing them with a sprinkle of sea salt or crushed nuts. For a more decadent experience, you can drizzle melted chocolate on top before the final chill. This small touch not only enhances the visual appeal but also adds an extra layer of flavor, balancing the sweetness of the filling with a hint of saltiness or texture.
Ingredients
For the Chocolate Shell
- 8 oz milk chocolate, chopped
- 5 oz dark chocolate, chopped
For the Peanut Butter Filling
- 1 cup creamy peanut butter
- 1/2 cup powdered sugar
- 1/4 cup unsalted butter, softened
- 1 tsp vanilla extract
Mix the ingredients together until smooth, then proceed to fill the chocolate cups.
Instructions
Melt the Chocolate
In a microwave-safe bowl, combine the chopped milk and dark chocolate. Microwave in 30-second intervals, stirring in between, until fully melted and smooth.
Prepare the Molds
Using a spoon, evenly distribute a layer of melted chocolate in the bottom of a muffin tin lined with cupcake liners. Make sure to coat the sides as well.
Chill the Shells
Place the molds in the refrigerator for about 10 minutes or until the chocolate hardens.
Make the Filling
In a bowl, mix together the peanut butter, powdered sugar, softened butter, and vanilla extract until smooth.
Add the Filling
Once the chocolate shells are set, scoop a tablespoon of the peanut butter mixture into each cup. Smooth the top.
Seal with Chocolate
Top each filled cup with additional melted chocolate to cover the peanut butter filling. Use a spatula to smooth the top.
Final Chill
Return the muffin tin to the refrigerator for another 15 minutes to allow the cups to set firmly.
Serve
Peel the paper liners off the cups and indulge in your homemade treats!
Store any leftovers in an airtight container in the fridge.
Professionele Tips
- Feel free to experiment with different nut butters or add sea salt on top for a delicious twist.
Troubleshooting Common Issues
If you notice that your chocolate has seized up during melting, it may have come into contact with water or steam. When this happens, there’s no need to discard it; adding a small amount of vegetable oil can help rescue the mixture. Stir in the oil gradually until the chocolate becomes smooth again. This is a handy trick that has saved many baking adventures, including my own.
Another common issue is the filling being too soft to hold its shape. If this happens, you can solve it by chilling the peanut butter mixture in the refrigerator for about 15 minutes before scooping it into the chocolate shells. This helps the butter firm up slightly, allowing for easier portioning and smoothing.
Variations to Try
For those looking to switch things up, consider adding flavor to the peanut butter filling. A dash of cinnamon or a splash of maple syrup can elevate the flavor profile. Additionally, if you're feeling adventurous, small amounts of cocoa powder can turn your filling into a chocolate-peanut butter fusion that’s irresistible.
You can also experiment with different types of chocolate for the shell. White chocolate, dark chocolate, or even flavored chocolates like caramel can each bring a unique twist to your peanut butter cups. Just remember that each type may alter the sweetness and richness of the final product, so adjust the filling's sweetness accordingly to match.
Vragen Over Recepten
→ Can I use almond butter instead of peanut butter?
Yes, almond butter works wonderfully for a nutty flavor.
→ How do I store leftover peanut butter cups?
Store them in an airtight container in the refrigerator for up to two weeks.
→ Can I use sugar substitutes?
Yes, feel free to use your favorite sugar alternatives for a lower-calorie option.
→ Is there a vegan option?
Absolutely! Just use dairy-free chocolate and a plant-based butter alternative.
Homemade Peanut Butter Cups with Chocolate Shell
Gemaakt door: Lucy Thompson
Recepttype: Favoriete eenvoudige bakrecepten
Vaardigheidsniveau: Beginner
Eindportie: 12 cups
Wat je Nodig Hebt
For the Chocolate Shell
- 8 oz milk chocolate, chopped
- 5 oz dark chocolate, chopped
For the Peanut Butter Filling
- 1 cup creamy peanut butter
- 1/2 cup powdered sugar
- 1/4 cup unsalted butter, softened
- 1 tsp vanilla extract
Stappen
In a microwave-safe bowl, combine the chopped milk and dark chocolate. Microwave in 30-second intervals, stirring in between, until fully melted and smooth.
Using a spoon, evenly distribute a layer of melted chocolate in the bottom of a muffin tin lined with cupcake liners. Make sure to coat the sides as well.
Place the molds in the refrigerator for about 10 minutes or until the chocolate hardens.
In a bowl, mix together the peanut butter, powdered sugar, softened butter, and vanilla extract until smooth.
Once the chocolate shells are set, scoop a tablespoon of the peanut butter mixture into each cup. Smooth the top.
Top each filled cup with additional melted chocolate to cover the peanut butter filling. Use a spatula to smooth the top.
Return the muffin tin to the refrigerator for another 15 minutes to allow the cups to set firmly.
Peel the paper liners off the cups and indulge in your homemade treats!
Extra Tips
- Feel free to experiment with different nut butters or add sea salt on top for a delicious twist.
Voedingswaarde (Per Portie)
- Calories: 380 kcal
- Total Fat: 26g
- Saturated Fat: 15g
- Cholesterol: 195mg
- Sodium: 85mg
- Total Carbohydrates: 32g
- Dietary Fiber: 3g
- Sugars: 24g
- Protein: 6g